
When migrating data to a cloud hosted practice management provider (such as Clio), the Time Matters data export is ok to grab most data such as contacts, matters, and events. But what about emails? Here is a trick that will get all that data out of Time Matters and into an Excel XLSX spreadsheet.
(Note: I used Excel 2007)
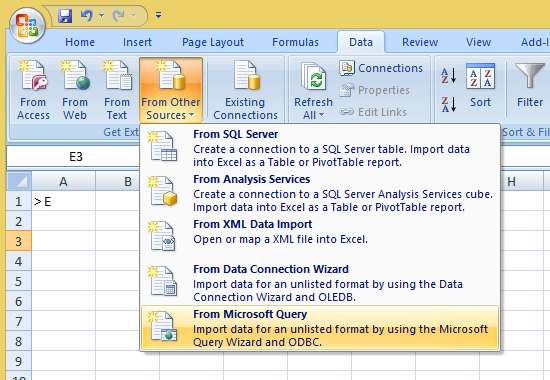
From the Data ribbon, click “From Other Sources” and the “From Microsoft Query”
Choose <New Data Source>, name your connection, choose SQL Server driver and click Connect. Here you will need to know your SQL instance and the sa password. Uncheck “Use trusted connection” and enter the login ID as “sa” and the sa password. Click Options and change the Database to your Time Matters instance.
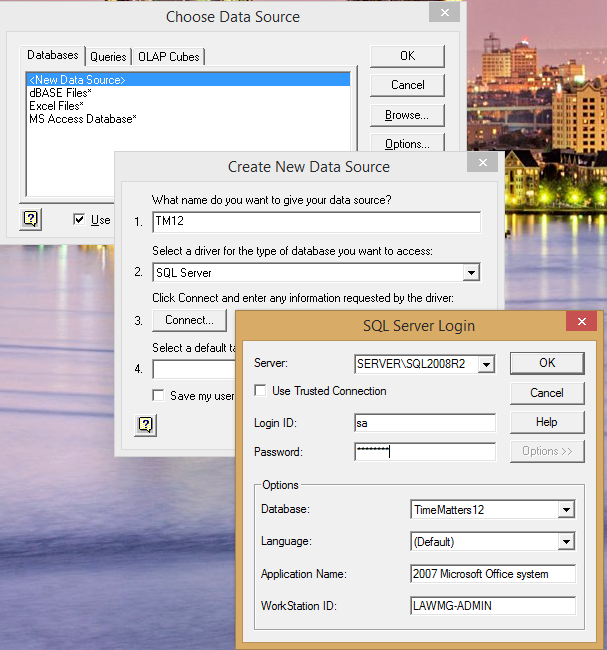
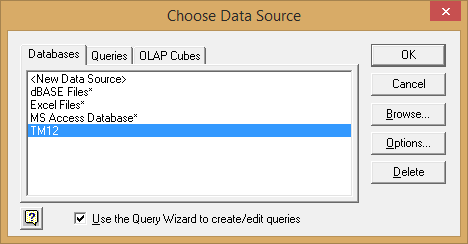
click OK and Save your data source. Now choose that data source and click OK
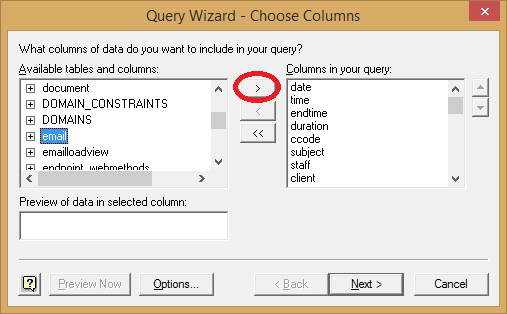
Now you can choose the table you want to pull data from. This will actually give you more complete export information than the TM export CSV if you want. For this example, I am pulling Emails. Choose “email” and hit the “>” carrot to bring the columns over into the query. Click Next.
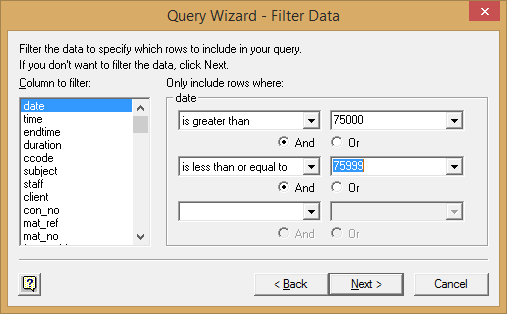
I don’t want to pull all the emails at once, so I choose to filter based on date. The range in actually in a weird binary format, so try different values to see what works for you. Here I’m going to pull emails saved between 75000 and 75999. That will be approximately May of 2006 through January 2009. Set up your own “is greater than” and “is less than or equal to” here and click Next. (NOTE: you may think I’ll just grab all the email rows in one query. Good luck. My Excel crashes when the file grows to over 200MB)
Choose if you want to sort it by any of the columns. I choose not to sort at this point. Just click Next.
On the Finish screen, make sure to hit “Save Query”. That way you can run all those other dates you want to pull. Keep “Return Data to Microsoft Excel” selected. Click Finish and wait for all the data to pour into your worksheet.
The next query you run can be found from the Data ribbon, click “From Other Sources” and the “From Microsoft Query” then the QUERIES tab. Lastly, don’t forget about date protection and its benefits. You can learn more about the Venyu – cloud options here.